Saturday, September 15, 2012
Succulent Wreath: D.I.Y. with "THE DAILY"
I am very excited to present this video that I worked on with "THE DAILY". A succulent wreath is a fun alternative to the traditional succulent garden.
Cork Magnets
 |
| Orchid Flower |
 |
| Baby Echeveria |
 |
| Billy Button and Sedum |
 |
| Dried Lavender |
Have you ever wanted to do something with all those champagne corks you've saved over the years? Or are you looking for an excuse to indulge in a bottle of Prosecco? I thought this would be a cute project after finding inspiration on Pinterest. I've been looking for a unique place to put plants in my kitchen, however I don't have a lot of extra space. These cork magnets stick to anything metal and brighten up the room in the most adorable way, allowing even the most cramped of spaces the chance to be "spruced up". Just follow these easy steps:
 |
| First, hollow out the inside of a champagne cork with an electric drill. |
 |
| Using any strong glue... |
 |
| ...attach a magnet to the top of the cork |
Depending what you are "planting" in your cork, the next step will vary. If using dried flowers or an an air plant, it is best to pin the item into the cork using a couple staples. If using a baby succulent, a couple pinches of soil and gravel do the trick. If using a fresh flower, stuff with damp moss before fastening the flower.
After completing this project I think Air Plants would be a great option for these cork magnets. They come in different colors, and only need to be sprayed once a week. The Air plant is a lot hardier than succulents and flowers resulting in a more durable magnet. They can even be glued into the cork without harming it.
 |
3's
Having grown up as the middle of three sisters, the number three has become very significant in my life. In addition to the aesthetic beauty of arranging flowers or succulents in groups of three, there is something special about this simple pattern that transcends the rhelm of "normal beauty"! The following groups of plants make up a series of trios.
 |
| Cactus Trio: Multiple colors of the same pot tie this look together. |
 |
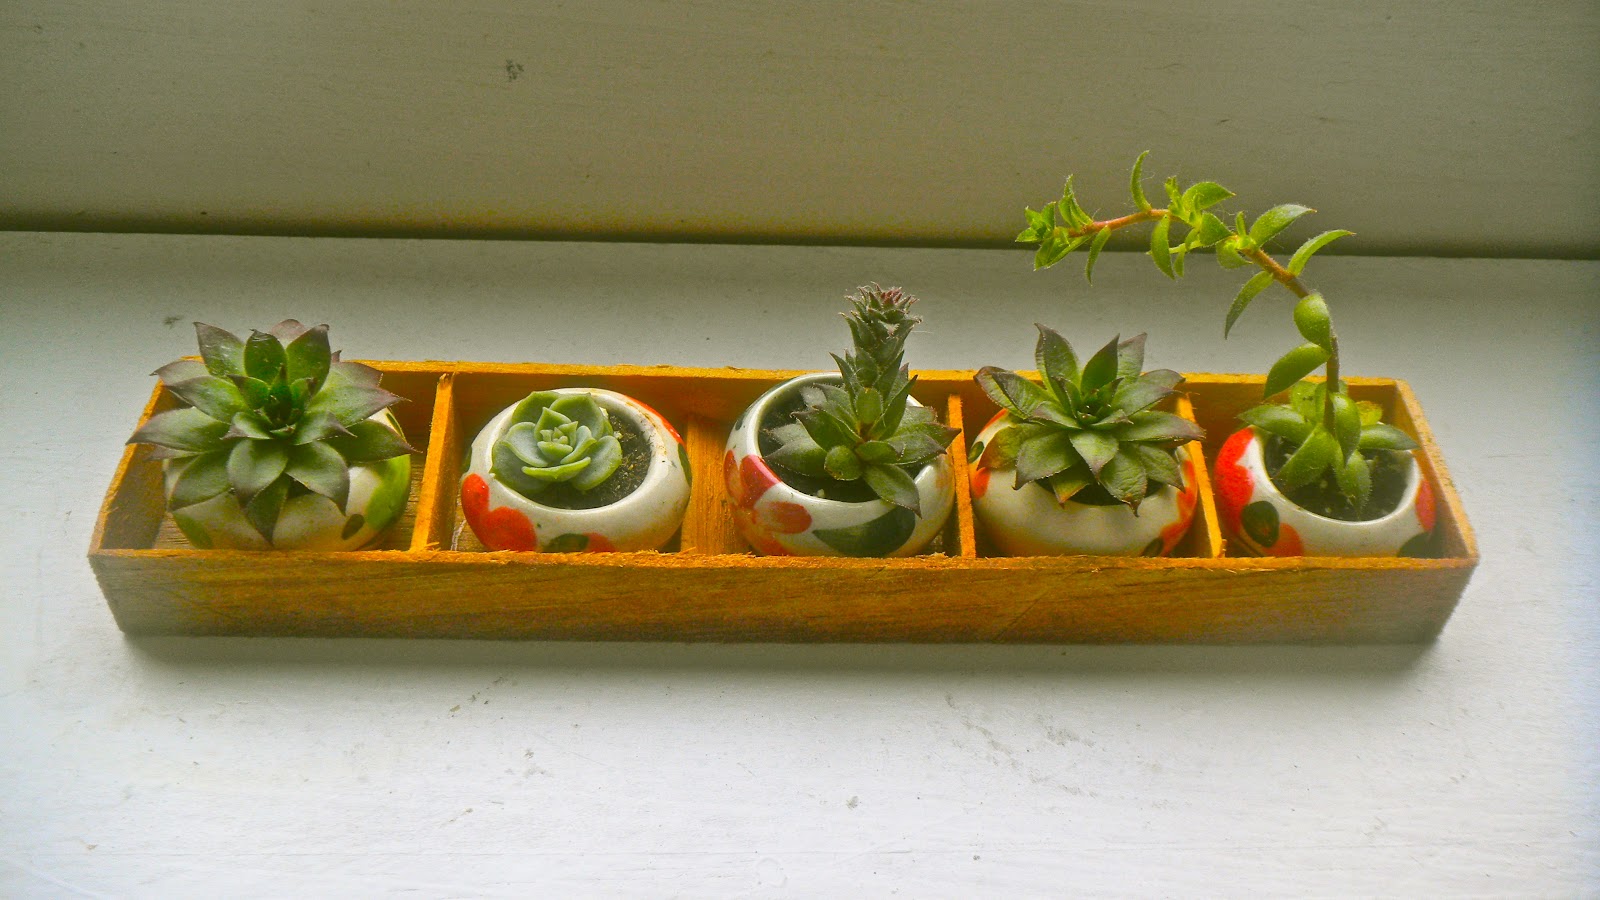
| A Few Favors: Perfect for a small table or outdoor space |
 |
| Trident of Corks: The cutest magnets on the upper west side |
Thursday, August 2, 2012
ITALY: AMALFI COAST

THE AMALFI COAST: POSITANO
 |
| This was our view from our balcony. |
 |
| As you can see Positano is built vertically on the face of a mountain |
 |
| Literally built into the mountain... |
 |
| There were 450 steps to get down to the beach from our hotel... On our third day I literally could not walk without looking really strange, my calf's were SO SORE! Hence the smile on my face, this photo must have been taken day 2, 5 or 6. ;) |
 |
| This is a cactus that is climbing up the wall of this home. I've never seen a cactus act like a vine. So cool! |
 |
| As I mentioned before, there was Bougainvillea everywhere! Covering entry-ways, canopying balcony's, lining the multiple stairwells throughout Positano. It was amazing! |
 |
| Flowering succulents growing out of rocks. |
 |
| Potted Haworthia (much larger than the ones I have at home). |
To be continued... next post: Tropea!
Thursday, June 7, 2012
Succulent Care: The Basics
Succulents are such amazing plants to have in your home. There are thousands of different types to choose from, all varying in color, texture and size. Succulents are so vibrant and symmetrical; their leaves are often arranged like blossoming flower. In addition to this beauty, one of the more appealing attributes is how easy they are to take care of. If you follow a few rules regarding soil, potting, watering schedule and sunlight your succulents will live for years to come. This blog post focuses on small indoor potted succulents; outlining the most important succulent care information I've collected via research and my personal experiences.

The Soil: You can find a pre-mixed bag of succulent and cactus soil at most nurseries or plant stores. If you want to make your own: mix together sphagnum peat moss, reed sedge peat, perlite, sand and limestone. I'd say its easier to buy the mix. :)
 |
| Fafard is what I've been using and I love it! |
The Pot: Succulents have shallow root systems that require little room so you don't need or want a deep pot. This is because the more soil you have the more likely the soil will stay damp after watering, which can lead to root rot. My succulents are in dozens of different pots, ranging in size from 3 to 7 inches deep. (This is a good range for smaller sized succulents). This next bit of advice is one of the most important rules when working with succulents: Make sure your pot has a hole in the bottom! That way when you water, the water will drain out. When there is no drainage hole the water will just sit in the pot, keeping the soil and roots wet... succulents don't like this! It is a perfect recipe for root rot. If you absolutely must use a pot with no hole and you are unable to drill a hole the next best thing is to place a layer of rocks, gravel, broken sea shells, or of mix of these in the bottom of the pot before you fill it with soil..
 |
| Like so... ;) |
However, I have found even when I do this my plants don't do as well as the one's with holes in their pots. I actually put rocks in the bottom of all my pots even the one's with the holes in the bottom. This not only helps with drainage, but also keeps the soil from leaking out the bottom of my pot when I water.
 |
| This is standard sized pot (6") and should be super easy to find. |
 |
| This adorable pot became my new favorite after my husband drilled a hole in the bottom with an electric drill. |
Watering: Succulents do not need as much water as your other house plants. The #1 way to kill your succulents is to overwater. In the winter months water once every 2 weeks. In the summer water about once a week. These are general rules and each plant / pot is different. The larger the pot and or plant, the less frequent it needs to be watered. I've found it helpful to put make note on my calendar when I water.
Clues that its time to water:
* Stick your finger in the soil, it should be very dry.
* The leaves are looking slightly shriveled and less plump.
* Lift pot... It should feel quite light. Compare this to the weight of a pot you just watered.
Sunlight: Succulents do best when they receive 3-4 hours of early morning or late afternoon direct sunlight and are shaded during the hottest part of the day when the sun is strongest. If left in the hot sun all day they will more than likely burn, resulting in ugly brown spots. That being said, I live in NYC with Northern exposure and there are only a few precious areas that receive direct morning sun in my apartment. I move my plants around every couple of days giving each of them a turn to bask in the sun. This isn't ideal, but my succulents are doing just fine.
Where to Buy Succulents: You can buy succulents at most plants stores, they are usually with the cactus. Home Depot and Lowe's often have a great selection. If you live in NYC the flower district can provide everything you're looking for and more in terms of plants, flowers, soil, pots... EVERYTHING! It's located on 28th street between 6th and 7th avenues. If you can get there before 11am you can catch the flower shops before they close. Some of them sell wholesale only, but most shops will sell to the public and you are guaranteed to get the freshest flowers in the city, they get shipments daily from all over the world... it's pretty awesome!
Allright... There you have it! Now go buy some succulents and make your windowsill happy!! :)
Saturday, May 19, 2012
Succulent of the Week: Perle von Nurnberg
 |
Family: Crassulaceae
Genus: Echeveria
Species: hybrid of E. gibbiflora var metallica and E. potosina
|
 |
| Notice the gorgeous stem of coral flowers which produce in the Spring and Summer months |

Thanks for stopping by... Have a fabulous weekend!!
Wednesday, May 16, 2012
Succulents in tea lights
 |
| These are cuttings from my Hen and Chicks plant |
 |
| Varying in size, color and type amplifies cute factor |
This is my most recent succulent project. These adorable little pots were originally filled with tea lights. I lit the candles and they latest all of 20 minutes (such a rip)! I love that they are hand painted and I really wanted to find another use for them. It didn't take long to think of my succulents. :)
* First: I filled the mini pots with a pinch of gravel and topped with succulent soil.
* Second: I clipped the cuttings from my Hen and Chicks. See the pic below.

When dealing with succulent cuttings in general, it is usually a good idea to let the cutting callus over before placing it in the soil. You can do that by laying the cutting on a small plate and leave it alone for a few days. Some people even dip it in a rooting hormone before planting. I chose not to do any of this today because Hens and Chicks are really easy to root and I didn't feel like waiting. Unlike most other plants, it is best NOT to water your chicks after planting. Wait at least a of couple weeks. Due to the fact these pots are so small they are only going to need about 1 tsp of water at a time, every 2 weeks or so.
Thursday, May 10, 2012
DIY Mother's Day Bouquet: Video
via The Daily
I am so excited to present this video that I worked on with THE DAILY! Mother's Day is right around the corner and there isn't a mom in the World that doesn't love receiving flowers. Unfortunately, prices double or triple as appreciative children, husbands and partners rush to place last minute orders through a florist. To avoid this expense and the potential of impersonal flowers, I demonstrate how to arranging them yourself. Additionally, you can always customize a bouquet using her favorite flowers. I chose peonies, lilacs and hydrangeas because in my opinion there is nothing more feminine than a peony, lilacs smell AMAZING, and hydrangeas are inexpensive and dry beautifully.
Step By Step Instructions:
* When you get home from the store with your flowers immediately remove rubber bands, plastic wrap. Trim stems 1 inch and put in warm water.*
1.) Always start with a clean vase or container.
2.) Fill vase 3/4 full with warm water.
3.) Add flower food and stir until dissolved. (Use packet from flower shop or make your own, see recipe below).
4.) Tape grid using floral tape. Start with your first strip of tape in the center of vase and continue, then cross the opposite way. The grid holes should vary in size based on the thickness of stems. This grid will help keep the flowers in place.
5.) Remove all leaves and foliage, unless you want to include it in your bouquet. Always remove all leaves that will fall below the water line, this prevents rot.
6.) Lay out flowers and sort by type.
7.) Trim stems by cutting at an angle; the slanted cut allows for more water absorption.
8.) The peonies should vary in height 1-3 inches taller than the vase. The lilacs and hydrangeas should be cut to the same height as the vase.
9.) Start with the peonies. Place the tallest stem in the center of the vase and work your way outward. As you move outward the stems should get shorter, thus creating a dome. Alternate hydrangeas and lilacs around the perimeter of the vase.
* To keep your flowers alive longer, trim the ends of the stems and replace water and flower food every 2 - 3 days.
Flower Food:
1 Tbsp sugar
1 Tbsp white vinegar
1/2 tsp household bleach
Thursday, May 3, 2012
Succulent of the Week: Sedum Burrito
Other names: Donkey's tail, Burro's tail
Origin: Mexcio
Family: Crassulaceae
Genus: Sedum
Light Requirements: full sun to filtered light
Water Requirements: drench well and let dry fully between waterings
Best Pot: Hanging planter
This exceptional plant is an explosion of beauty. It's erotic dreadlocks are yet another example of nature's incredible imagery.
 When I first started researching this plant I was a little unsure as to whether it was Sedum Burrito or Sedum Morganianum. As it turns out the two are often confused and hard to distinguish one from another. Sedum Burrito was officially titled a distinct species in 1977, however the information was recorded from two plants that were bought from a nursery in a small town outside of Guadalajara, Mexico and no data has ever been collected from the wild. Sedum Morganianum was titled in the 1930's from cultivated material in the same small town. Some people believe that Sedum Burrito is a hybrid, but there is no definitive answer as to who both parents are... Clearly Sedum Morganianum would be one, but the other isn't as obvious. The main difference that I can see is that Sedum Burrito's leaves are a little shorter and a little rounder than Morganianum's. You can see the difference in the pics below.
I own a smaller sized Sedum Burrito and I'm eager to watch it grow into long, thick locks! However, it's going to be a while because apparently this plant grows pretty slowly. The longer it gets, the heavier the stems will get and breakage will more than likely occur. The bright side of a stem breaking off is you can easily propagate it by sticking it in a pot filled with succulent and cactus soil; it should root on its own in a couple of weeks.
Origin: Mexcio
Family: Crassulaceae
Genus: Sedum
Light Requirements: full sun to filtered light
Water Requirements: drench well and let dry fully between waterings
Best Pot: Hanging planter
This exceptional plant is an explosion of beauty. It's erotic dreadlocks are yet another example of nature's incredible imagery.

 |
| Sedum Burrito: shorter, rounder leaves and stronger stem |
 |
| Sedum Morganianum: longer leaves and weaker stem |
 |
| My Sedum Burrito in a windowsill |
 |
| Notice how the leaves are growing upward instead of down like the other photos I put up. This tells me I need to get this plant in a hanging planter because the leaves are growing towards the light and will eventually get too heavy. |
Monday, April 30, 2012
Flower Fun!
 |
| Playing with flowers! Left: Billy Buttons in an adorable flower vase. Middle: Sarah Bernhardt Peonies, green hydrangea, and purple lilacs in a tin bucket on a cake stand. Right: Lavender Anastasia Spider Mums in a white teapot. |
Friday, April 20, 2012
Happy 420
 |
| bbn.frn.com |
Today is essentially a holiday for the Cannabis plant. Being this is a plant blog... I certainly am not going to discriminate. Having grown up in Colorado and lived in California for 3 years, the Cannabis plant is something I have become quite familiar with. The legalization of marijuana for medicinal purposes is something I feel strongly about. I watched my sister go through a year of treatment which was very similar to chemotherapy. The drug left her feeling very sick - extremely nauseous, her appetite was non-exsitant, and she experienced severe body aches. It broke my heart to see her that way. Her doctors prescribed her a medley of drugs to help control the adverse side effects. They, of course introduced a whole new set of issues. When she smoked Marijuana it alleviated nearly all of her discomfort within minutes and gave her the strong appetite she needed. Although the legalization of medicinal marijuana has been a slow process, the most recent map of states that are on board or are on the way is quite promising. This is definitely something to smile about. :)
 |
| Echeveria and Mums looking out my window |
Thursday, April 19, 2012
Air Plant (Bryophullum Pinnatum)
 |
| The cutting came in a little plastic pouch attached to this label. |
 |
| You can see it produces these little lantern-like flowers. |
Bryophullum pinnatum is a type of succulent it is also known as Air Plant, Miracle Leaf and Resurrection Plant, mainly because it reproduces so quickly. I just planted it 2 days ago and the cutting already sprouted a little plantlet. In Hawaii it is actually considered "a moderate invader" because it reproduces so quickly. I followed the instructions on the back of the label which said to fill a pot with a mixture of peat moss and perlite, both of which you can find at your local garden supply or plant store.
 |
| Fill your pot with 80% peat moss |
 |
| Fill your pot with 20% perlite |
 |
| Lay the leaf on top of soil mixture. If you look closely you can see the baby plantlet. |
Monday, April 16, 2012
Welcome...
Hi! Welcome to Succulents and Saucepans! My name is Taysia Scarano, I currently live in NYC in Manhattan's Upper West Side. I was raised in the beautiful state of Colorado in a small mountain town called Evergreen. Surrounded by vast forests of Conifer trees and blue skies that stretch on forever, I developed an intimate connection to nature at an early age. NYC may have a lot of attributes but nature and wide open spaces are not among them. In an effort to remain true to my roots and at the same time maintain my sanity, I fill my home with a myriad of plants and flowers. Thirty seven plants line our wall of windows, each strategically placed in an effort to soak up every ray of sunlight from our limited Northern exposure. My husband calls me a plant hoarder; but in my mind, as long as they are healthy and well taken care of, the more the merrier. I plan to use this blog to document my journey as a passionate plant owner and to share all that I learn along the way. In addition, I love spending time in the kitchen so there will be some edible goodness here as well. These are a few of my favorite things...
 |
| Peonies: Best. Flower. Ever! |
 |
| Baby Succulent Gardens: my favorite art project |
 |
| Best Earl Gray Tea: Thé des Lords |
 |
| Leo: My 3 and half year old Pit mix |
 |
| Taste Nirvana Coconut Water: I want this stuff on tap!
(voguechanel.tumblr.com) (greenwaredesign.com) (www.kathyylchan.com)
(coconutwaterlife.com)
|
Subscribe to:
Comments (Atom)